Creating images on the fly is awesome. Need an image with different dimensions? Cropped? Lower quality? No problem, just do it right in your template.
I presume by now you've looked over the other tutorials and you know about templates, fields and creating pages.
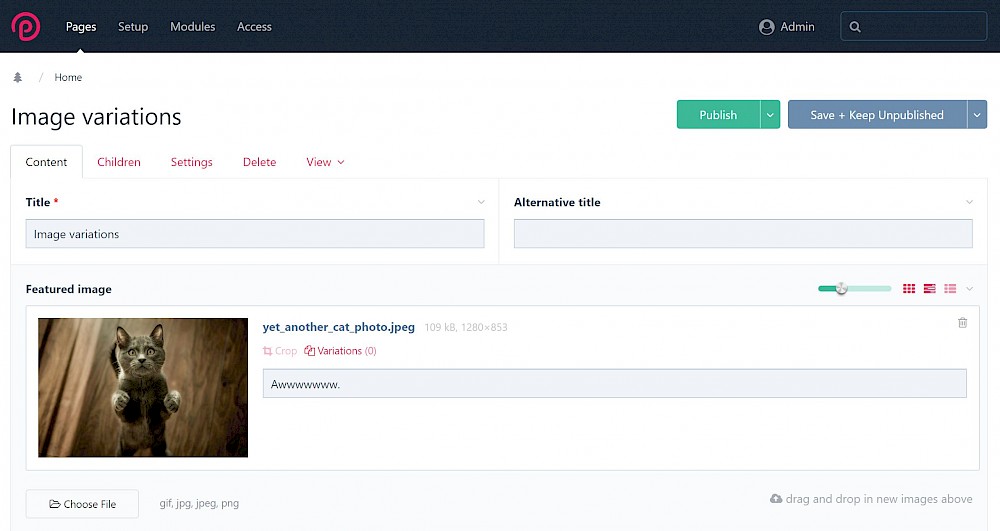
Create an 'Image variations' page using the 'basic-page' template. This template has a single image field called 'featuredImage'. If you need a refresher, you can check out details about the images field type. Upload an image in there so we can do some stuff with it in our template file.
We'll just create a basic skeleton of the page using the Bootstrap 4 CDN.
<?php namespace ProcessWire; ?>

<!DOCTYPE html>
<html lang="en">
<head>
  <meta charset="UTF-8">
  <meta name="viewport" content="width=device-width, initial-scale=1.0">
  <meta http-equiv="X-UA-Compatible" content="ie=edge">

  <title>
    <?php
      // print the current page field altTitle value
      // if blank or not present, print title field value
      echo $page->get("altTitle|title");
    ?>
  </title>

  <link rel="stylesheet" href="https://maxcdn.bootstrapcdn.com/bootstrap/4.0.0-beta/css/bootstrap.min.css" integrity="sha384-/Y6pD6FV/Vv2HJnA6t+vslU6fwYXjCFtcEpHbNJ0lyAFsXTsjBbfaDjzALeQsN6M" crossorigin="anonymous">

</head>

<body>


  -- OUR IMAGE CODE WILL GO HERE --


  <script src="https://code.jquery.com/jquery-3.2.1.slim.min.js" integrity="sha384-KJ3o2DKtIkvYIK3UENzmM7KCkRr/rE9/Qpg6aAZGJwFDMVNA/GpGFF93hXpG5KkN" crossorigin="anonymous"></script>
  <script src="https://cdnjs.cloudflare.com/ajax/libs/popper.js/1.11.0/umd/popper.min.js" integrity="sha384-b/U6ypiBEHpOf/4+1nzFpr53nxSS+GLCkfwBdFNTxtclqqenISfwAzpKaMNFNmj4" crossorigin="anonymous"></script>
  <script src="https://maxcdn.bootstrapcdn.com/bootstrap/4.0.0-beta/js/bootstrap.min.js" integrity="sha384-h0AbiXch4ZDo7tp9hKZ4TsHbi047NrKGLO3SEJAg45jXxnGIfYzk4Si90RDIqNm1" crossorigin="anonymous"></script>

</body>

</html>
Ok, let's create some images! Replace the '-- OUR IMAGE CODE WILL GO HERE --' section with:
<?php
// if page has single image field called 'featuredImage' and has an
// image uploaded to it. This alternate syntax 'if' wraps this whole block of PHP/HTML
if ($page->featuredImage):
// save some typing...
$image = $page->featuredImage;
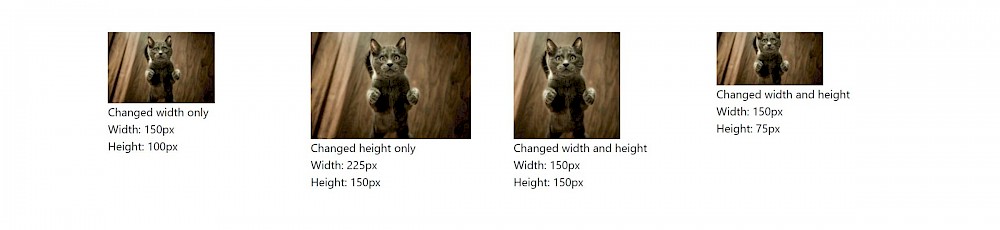
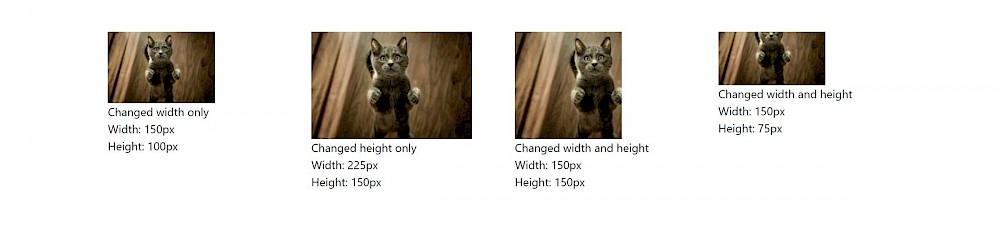
// create four images using image resize functions
$widthOnly = $image->width(150);
$heightOnly = $image->height(150);
$square = $image->size(150, 150);
$rec = $image->size(150, 75);
?>
<div class="container py-5">
<div class="row">
<div class="col">
<img src="<?php echo $widthOnly->url; ?>" />
<p>
Changed width only</br>
Width: <?php echo $widthOnly->width() . "px"; ?></br>
Height: <?php echo $widthOnly->height() . "px"; ?>
</p>
</div>
<div class="col">
<img src="<?php echo $heightOnly->url; ?>" />
<p>
Changed height only</br>
Width: <?php echo $heightOnly->width() . "px"; ?></br>
Height: <?php echo $heightOnly->height() . "px"; ?>
</p>
</div>
<div class="col">
<img src="<?php echo $square->url; ?>" />
<p>
Changed width and height</br>
Width: <?php echo $square->width() . "px"; ?></br>
Height: <?php echo $square->height() . "px"; ?>
</p>
</div>
<div class="col">
<img src="<?php echo $rec->url; ?>" />
<p>
Changed width and height</br>
Width: <?php echo $rec->width() . "px"; ?></br>
Height: <?php echo $rec->height() . "px"; ?>
</p>
</div>
</div>
</div>
<?php
// close alternate syntax if statement
endif;
?>Now view your page:
Good job! Now you've created some images on the fly. Now they're created, they're in your filesystem at:
/YOUR-SITE-ROOT/site/assets/files/PAGE-ID/
The page id is the ID of the page where the image upload field is, so for example, my files are at:
C:\laragon\www\demosite.pwtuts\site\assets\files\1073
Inside there, I now have:
yet_another_cat_photo.0x150.jpeg
yet_another_cat_photo.0x260.jpeg
yet_another_cat_photo.150x0.jpeg
yet_another_cat_photo.150x75.jpeg
yet_another_cat_photo.150x150.jpeg
yet_another_cat_photo.jpeg
But there's six of them? You only created four. Let's step through it:
// Original image
// yet_another_cat_photo.jpeg
$widthOnly = $image->width(150);
// creates yet_another_cat_photo.150x0.jpeg
$heightOnly = $image->height(150);
// creates yet_another_cat_photo.0x150.jpeg
$square = $image->size(150, 150);
// creates yet_another_cat_photo.150x150.jpeg
$rec = $image->size(150, 75);
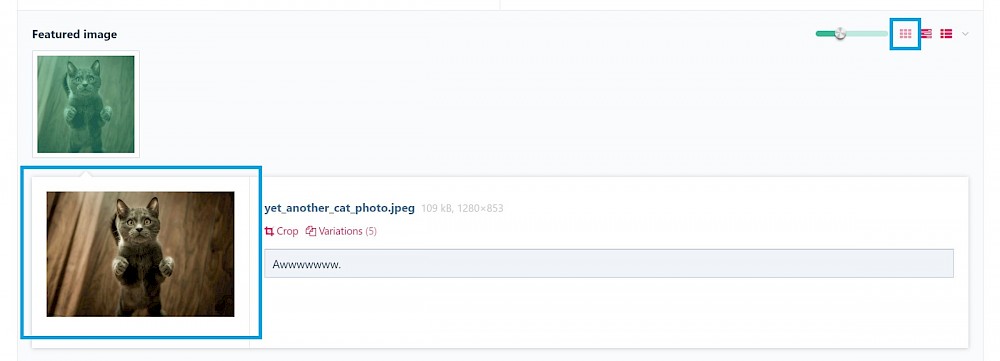
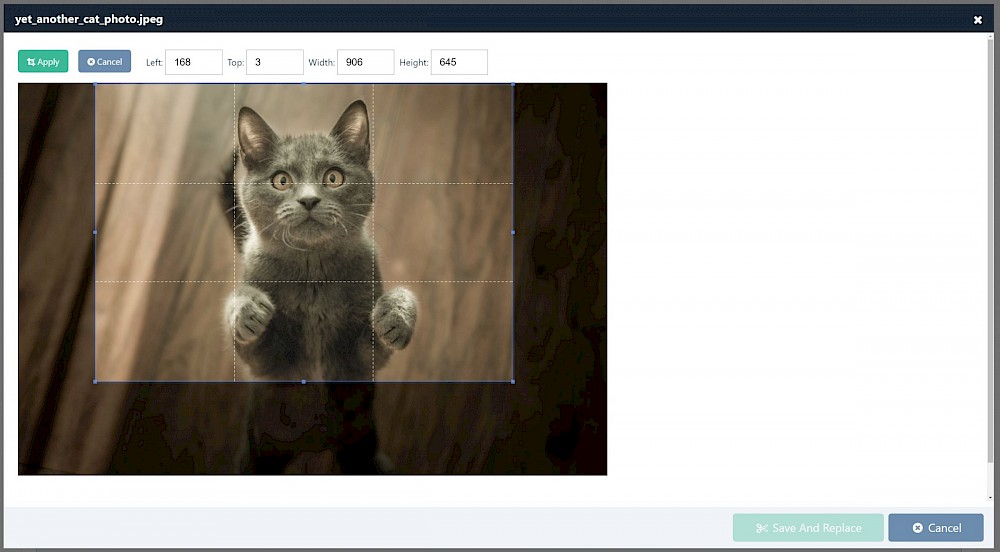
// creates yet_another_cat_photo.150x75.jpegBut what about the sixth one? Where does 'yet_another_cat_photo.0x260.jpeg' come from? Change the grid view of the image to 'grid' and click on the image to reveal a larger version with the description field. This is just an auto-generated image based off your original and all of your images will have this variation whether you create images on the fly or not.
Click on 'Variations':
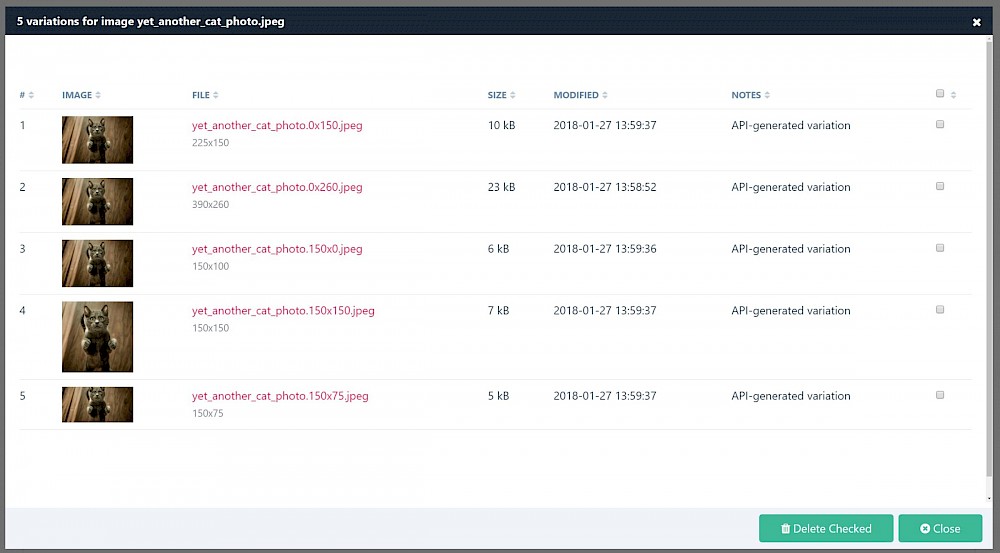
There they all are. Now you should have a good idea of how this works. If you delete the images out of the filesystem (ones with '0x260' etc. in the filename, leave the original), the variations disappear.
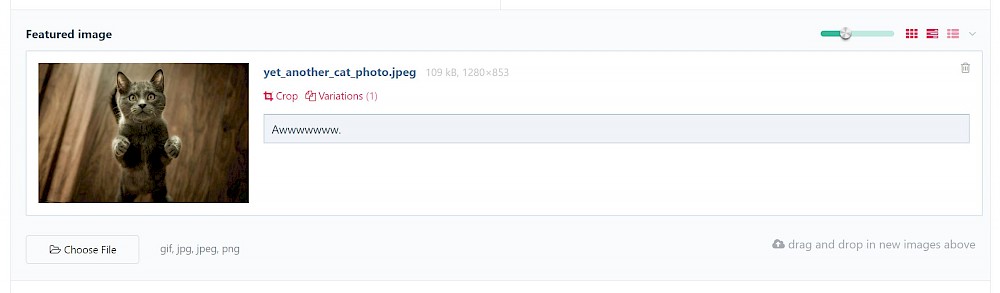
You can also delete them directly in the variations modal window and a few other ways mentioned below depending on whether you want to remove them or replace them. Either way, they wll be recreated the next time your template file script runs (when your page loads in a browser).
You can also pass an array into some of the image resize functions:
<?php
  // if page has single image field called 'featuredImage' and has an
  // image uploaded to it. This alternate syntax 'if' wraps this whole block of PHP/HTML
  if ($page->featuredImage):

    // set some options
    $options = array(
      "quality" => 5,
      "upscaling" => false,
      "cropping" => true
    );

    // save some typing...
    $image = $page->featuredImage;

    // create four images using image resize functions
    $widthOnly = $image->width(150, $options);
    $heightOnly = $image->height(150, $options);
    $square = $image->size(150, 150, $options);
    $rec = $image->size(150, 75, $options);
?>
So we've changed the quality down to '5' from the default '90'. Refresh your page and you'll notice nothing has changed. You'll need those images to be recreated... so as discussed, you can:
a) Delete the variations in the modal window when you click the 'Variations' button, or
b) Delete the variations from the filesystem, or a new one:
c) run $imagefieldNameHere->removeVariations(); in your script before the new ones are created (but you must remember to remove this line or it'll happen every time the page loads), or
d) since PW v2.5 you can use the 'forceNew' (bool) option in the array which will overwrite the variations. This also needs to be removed once you are happy with your variations.
Let's do it! Change your $options to:
// set some options
$options = array(
  "quality" => 5,
  "upscaling" => false,
  "cropping" => true,
  "forceNew" => true
);
Then refresh your page:
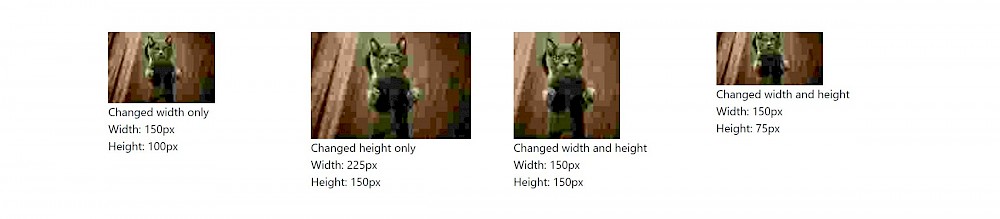
Woah! Reminds me of being back on the Amiga in my younger days. Kinda awesome actually, but probably not what you wanted. Anway, you can crop the images here too.
The default setting is 'true'. So, let's say you have an image you want to create at 400px x 300px and the original is 1920px x 1080px, the original image is resized until the first dimension is reached whether it be the width (400px) or the height (300px). Of course, if the original is a square, and you create a smaller square, both dimensions will be reached at the same time when resizing, hence no crop. In a nutshell:
1) If the width is reached first, the height is cropped, so the top and bottom get chopped off to reach the correct final dimension.
2) If the height is reached first, the width is cropped, so the left and right get chopped off to reach the correct final dimension.
We'll change the quality back up and recreate the images and crop them towards the bottom left (southwest) i.e. you're aiming to keep the bottom left of the image. See how this differs from the default of 'true'?
// set some options
$options = array(
  "quality" => 90,
  "upscaling" => false,
  "cropping" => "southwest",
  "forceNew" => true
);
Then refresh your page:
You'll notice that in the last two images, the cat has moved out of the frame,which is probably undesirable, so knowing whats in the picture, you could probably crop north to be safe.
// set some options
$options = array(
  "quality" => 90,
  "upscaling" => false,
  "cropping" => "north",
  "forceNew" => true
);
That's better. However, if you set this as a default, what happens when an image has a subject that is in the lower half? Then that will be cropped out! You could always manually crop in the page admin area (see the 'Crop' link next to 'Variations') but aint nobody got time for that!
So, I've got some exciting news for you! You can try the new development version v3.0.89 where 'focus cropping' has been added to the core. I am extrememly excited about this, because, although there have been modules to do predefined crops like croppable image 3 in the past, the focus technique is very natural for content editors. They just choose which part of the image is of most importance, and it will remain visible regardless of variation size. This was a github request just fifteen days ago, that's right, fifteen days! And here it is.
I'll be writing a new tutorial in the coming weeks about setting image defaults sitewide (rather than directly in the template file as we just did) and of course, using this sweet new focus feature.